Testing for vulnerabilities
Introduction
The ThreatX four-stage blocking strategy is designed to reduce false positives while preventing malicious behavior from reaching your sites. When Request-Based blocking is enabled, the sensor blocks any standalone malicious request. When Risk-Based blocking is enabled, the sensor issues a series of timed block periods to any entity that exhibits persistent suspicious or malicious behavior, leading to a permanent blacklisting if the behavior continues. During a 30-minute Block period or while an entity is blacklisted, all requests from that entity are blocked from reaching the site.
When testing for vulnerabilities against your internal applications, the IP addresses of your penetration testers should be added to the whitelist before testing, and removed after testing is complete.
When testing for vulnerabilities in the sensor, the IP addresses of your penetration testers should not be added to the whitelist.
To add an IP address to the whitelist:
-
Navigate to .
-
In the iWAF Settings page, click the Whitelisted IP addresses tab.
-
Click the Add Entry button.
-
In the Add Whitelist Entry screen, enter the IP address.
-
Enter the reason for adding the IP address.
-
Set the Expiration. Typically, you choose Never but you do need to remove the address from the list when done testing.
-
Click Submit.
When done testing, remove the address by opening the Whitelisted IP addresses tab and click the Remove button in the entity’s row.
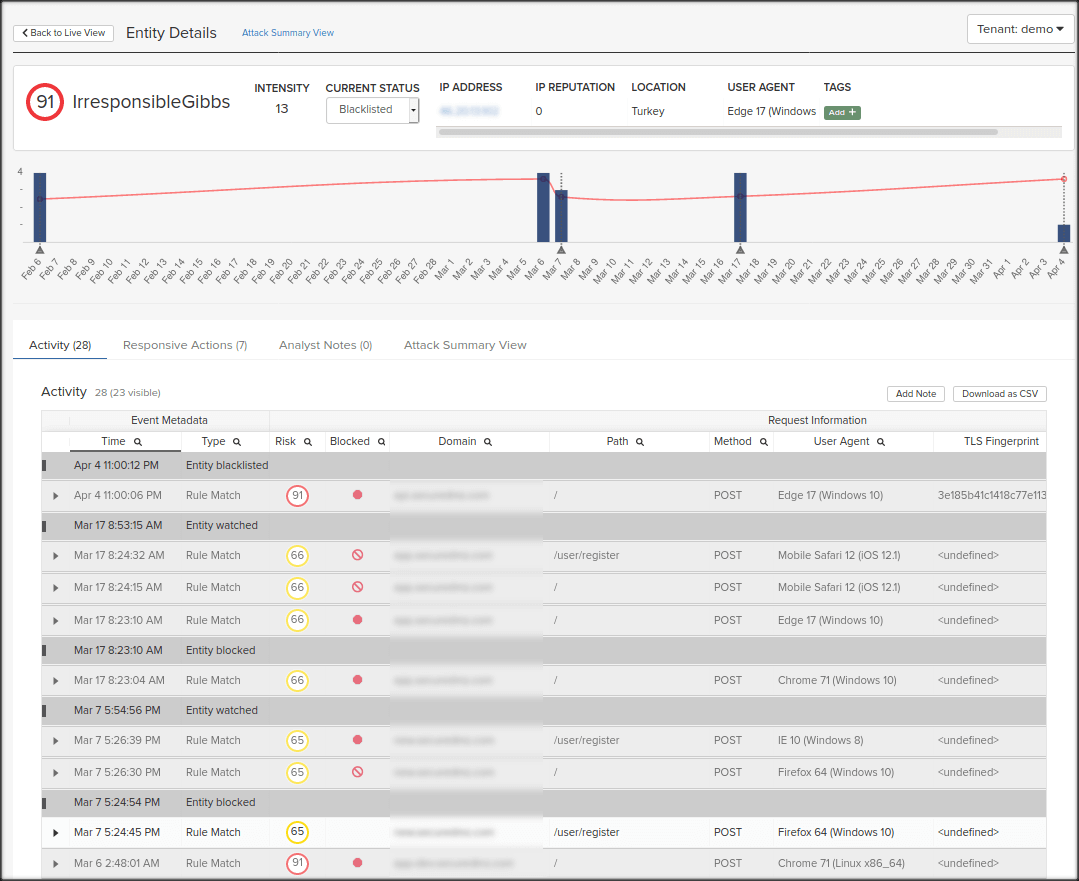
You can see when the IP address is blocked from the ThreatX user interface. In the following screenshot, the Gray requests were blocked from reaching the application. The White request was allowed through as it did not contain a standalone, viable attack or high-risk behavior.
